While there were about a dozen different answers in total from the commenters, there were 5 that clearly stood out as the TOP choices to scrap faster and I wanted to discuss those five options in a little greater detail.
#1 - SKETCHES
This was the number one tip among respondents!
Teresa Jaye said:
My favorite time saving tip is to use sketches! There are so many fabulous sketch artists out there - so there's no point in me sitting at my desk, staring at my photo's and supplies when some one has already come up with a fantabulous idea for me to use!
I won't go into too much detail on this one because as I expressed in a post earlier this year, sketches are a favorite time-saving tip of mine as well. Please visit that previous post for a list of my five favorite online sources for great sketches!
I also include a couple sketches in my :BE INSPIRED: Creativity Prompts each month, so be sure to check those out as well!
#2 - ORGANIZATION
Organization was second to using sketches (but not by much)! Of course, this tip took many different forms as everyone has their own definition and style of organization, but it was a stand-out tip just the same.
Elizabeth D. said:
My favorite time saving technique for scrapbooking is how I organize my projects. After an event I put all of the stuff in one file - pictures, postcards, brochures, etc, anything from that event. That way when I'm ready to scrap the event I'm not looking all over for my stuff, it's all in one convenient place.
Personally, I would LOVE (and dream about) having a dedicated scrapbooking room. Unfortunately, I don't believe that it's in the cards any time soon. However, I know that I MUST have a dedicated 'space' for maximum productivity so that I can leave my supplies out where I can see them (and therefore be more likely to use them) and leave in-progress projects out for whenever the creative mood might strike.
For now, this consists of two tables set up in the shape of an 'L' in our basement (in a room that serves about 4 other functions as well!). I organize my papers by manufacturer in a hanging file system and most of my stickers, rub ons and small embellishments are stored on a two-tier Clip It Up (this and this). I also love baskets, bins, drawers and fishing tackle boxes to store other various items.
Here's a couple other great online sources of information that I found online for staying organized:
Get Organized for Scrapbooking by Aby Garvey
Organization & Storage articles at Scrapbook.com
#3 - CUSTOM KITS
There are several reasons that scrapbooking kits are great way to scrap faster.
They can save you money. By having kits that are customized to coordinate, you won't end up buying a whole bunch of product that doesn't really 'go' and ultimately won't use.
And, of course, they can save you time. Shopping for supplies takes time. Traveling to and from your LSS (or not-so-local S) takes time - and money. Often, custom kits are quick and easy to order and are delivered right to your doorstep!!
Here's a couple of my favorite kit clubs:
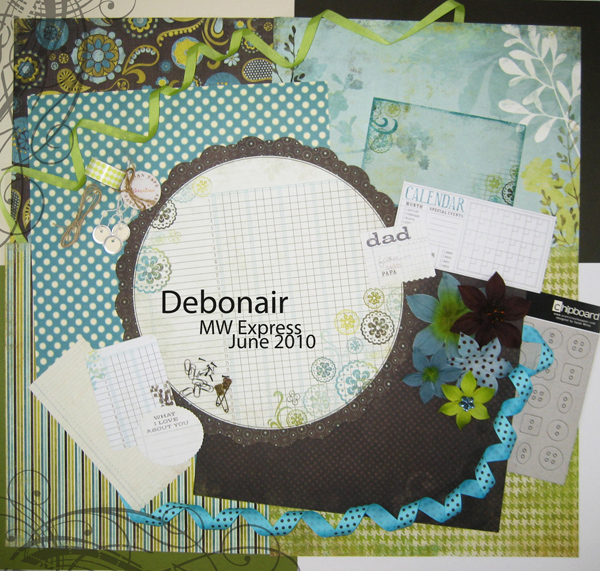
MemoryWorks Express Kits - Okay, yes...I am totally biased on this one, but I think you'll agree that they are beautiful.
Studio Calico
The Scarlet Lime
Little Red Scrapbook
Mosh Posh
#4 - FINDING/STORING INSPIRATION
Many of you really enjoy searching out inspiration online and in magazines to spur your creativity and avoid scrapper's block!
Melinda Wilson said:
When I am blog hopping, I see some wonderful layouts and I will copy and paste them into a word document. I keep adding to this document and over time will have several pages that I will print to take with me to a crop so I can scraplift some of the layouts and makes things move faster.
A great way to find FREE inspiration is to visit online galleries such as the one at Two Peas which is chock full of eye candy. Another great idea is to follow the blogs of the manufacturers you tend to buy a lot of or the kit clubs that you subscribe to as they are more likely to feature projects using the products that you already own in your stash!! I am an avid follower of the Fancy Pants, Pink Paislee and October Afternoon blogs just to name a few.
As for storing it, you can do anything from keeping an inspiration folder on your computer to creating a custom made inspiration binder like this one.
#5 - SCRAPLIFT
Last, but not least, scraplifting was also a popular time-saving tip. Even Melissa mentioned it in conjunction with finding inspiration in her comment above.
According to an article written for Scrapjazz.com by Andrea Steed, scraplifting is defined as follows:
The act of copying ideas and designs from another person’s scrapbook page to use in your own pages. Designs or ideas can be copied in whole or in part and is largely subjective.
While similar to using sketches when used to inspire the 'design' of the layout, scraplifting can also involve the 'lifting' of particular color schemes, titles/title treatments, products/product combinations and much more.
While a viable option for faster scrapbooking, there are certain things that you should consider when scraplifting someone else's layout such as giving credit where credit is due if you should happen to post the layout in an online gallery or on your blog. You should certainly disclose where you found your inspiration for the project. Also, under no circumstances should you submit the layout for publication or a contest...it simply isn't kosher.
Well, there you have it - five of the best time-saving tips for faster scrapbooking!
Now get to it...you've got no scrapping time to waste! :-)
READER RESPONSE:
Do you know of any additional online resources that you find especially useful and/or helpful in relation to the 5 points above? Share a link!


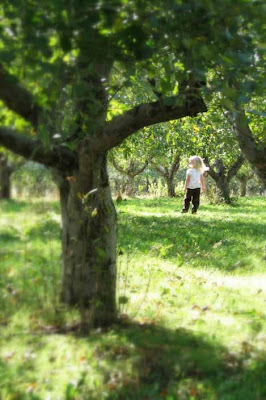
 #2 - Get Shady: While natural light is ideal, direct light is not. Contrary to popular belief, sunny days are not always best for taking photos. Direct light can cast harsh shadows on faces and cause squinting which is never flattering. Cloudy days can actually be better for taking photos. If you can’t avoid a sunny day, look for open shade such as on the side of a tall building (like I did in the shot below) or a lush tree to get better results.
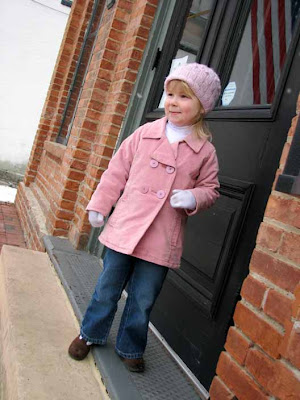
 #4 - Get Flashy (but not when you think): Flash indoors, no flash outdoors, right? Not necessarily. While using flash indoors is sometimes necessary in low light indoors situations, don’t flip up that flash out of habit. Open the curtains and let there be light. The colors will be more natural and warm. Then, when you can’t avoid direct sunlight outdoors, make sure that the subject’s back is to the sun to help avoid squinting and use your flash. It can actually help to fill in some of those nasty shadows.